
UPDATE – Now with a link to Part 2 of the article – see below.
Having a good internet connection these days, is almost as important as having food and water, in fact during the week, when trying to work from the boat, I would forgo the later two, in preference to staying connected!
In the three years since Old Nick was launched, we have been lucky enough to only struggle for an internet connection on a couple of occasions. Never completely without, but with speeds well below 5Mbit/sec, it made working a challenge and streaming TV in the evening a bit stuttery. This has mainly been due to the excellent antenna selection and installation by Ortomarine, and also in good selection of network operators – primarily EE with Vodafone as a backup.
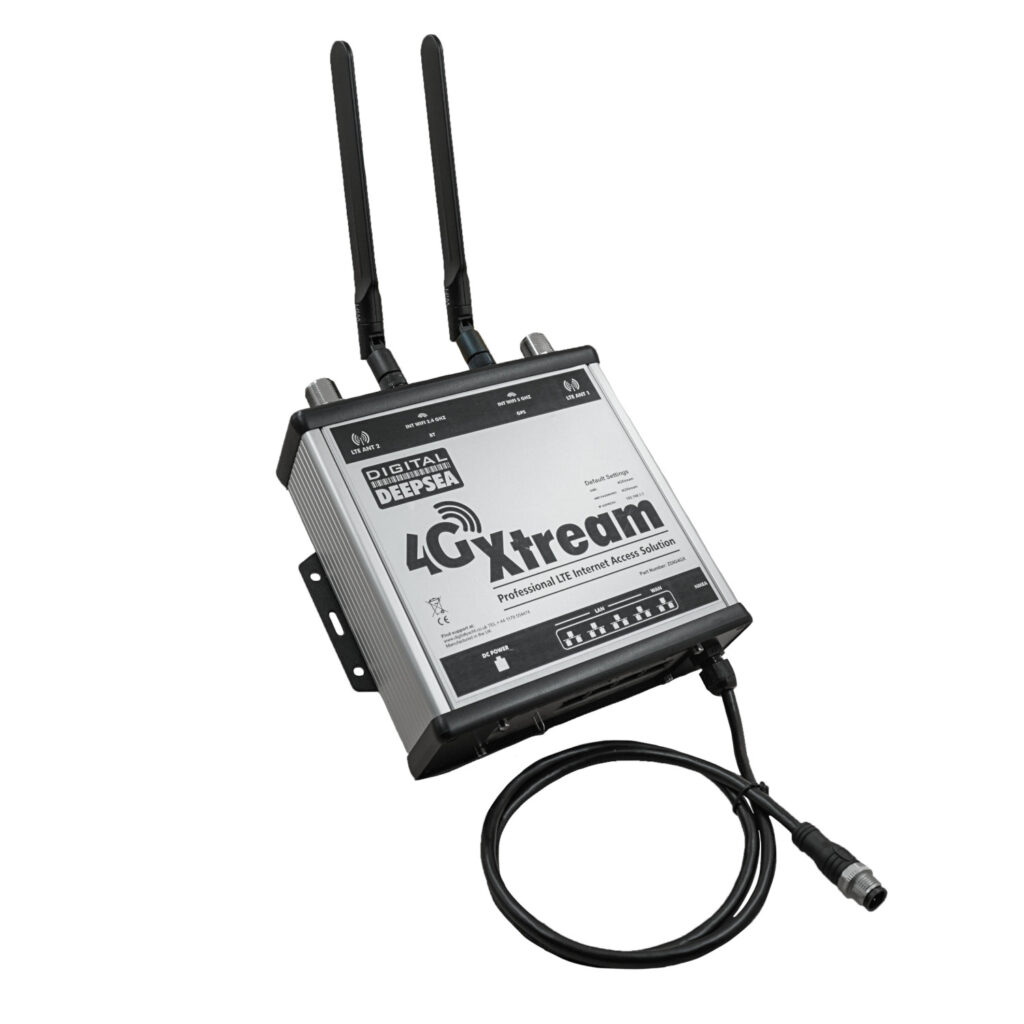
With the continuing rollout of 5G across the UK, we have not seen a noticeable difference in the 4G performance of our original wireless router (Digital Yacht 4GXtream), which in theory should benefit from the upgrades to the servers and infrastructure that all of the mobile operators are making. At the end of last year we upgraded to a new 5GXtream and this did give us faster performance, but no improvement in rural coverage, which is key when we are away from the marina in the Spring/Summer/Autumn.
I have been keeping an eye on Elon Musk’s Starlink system, since it started being sold in the UK, and enviously spotting the odd narrowboat with the distinctive antenna, but had never really looked at it in detail. However, the recent “half price” promotion of the Starlink Generation 2 hardware in the UK, caught our attention and the fact that we will be going “uber-rural” this season, on the River Nene, Middle Levels and Great Ouse, helped us justify our decision to go for it.
Even at half price (£225), Starklink is not a cheap option. It is not so much the hardware cost, but the £85 per month subscription fee. As a moving narrowboat, we have to have the “Roam” service, instead of the Standard service (£75/month), which allows us to use the system anywhere within the UK and Europe. The service can be stopped and started very easily, so if you are not continuously cruising, you just pay for the months you are cruising.
Last year, I had a bit of a wake up call, when my mobile phone bill reached £100 per month for the first time. With further increased charges promised in 2024, I decided to rationalise my mobile expenses and as I had finished paying for my phone, went for SIM only (25GB per month) and switched from EE unlimited Data SIM (£35/month) to a 1p Mobile 200GB Data SIM deal (£20 per month).
With Starlink our outgoings will increase again, but with the peace of mind, that we will always be online – wherever Old Nick takes us. We will still need a 4G Data SIM as backup (probably a 3 SIM for £15), as we will not cruise with the Starlink antenna up. Our router will switch automatically between the two systems, when we setup the antenna whilst moored and when we take it down to go cruising.
With the decision made, we ordered the Starlink hardware, from Currys, as John Lewis had already sold out(!) and within two days it was ready to be picked up from our local store. There is not much in the box, just the Antenna with integral 23m cable, Router with 1.8m Power cable and the “X” shaped stand for the antenna. The quick start was just three images, showing how to connect the parts together, but at least there was a QR code to take us to the online setup guide.
If you have ordered the hardware direct from Starlink, it will already be registered/activated, but because we had purchased from a retailer, the first thing we had to do was activate it. This involved typing in the Serial Number of the unit (on the packaging) and registering as a new user – all very straightforward. Once activated/registered, you need to set up the unit, which has to be done via the Starlink App – downloaded from the Apple or Android Stores.
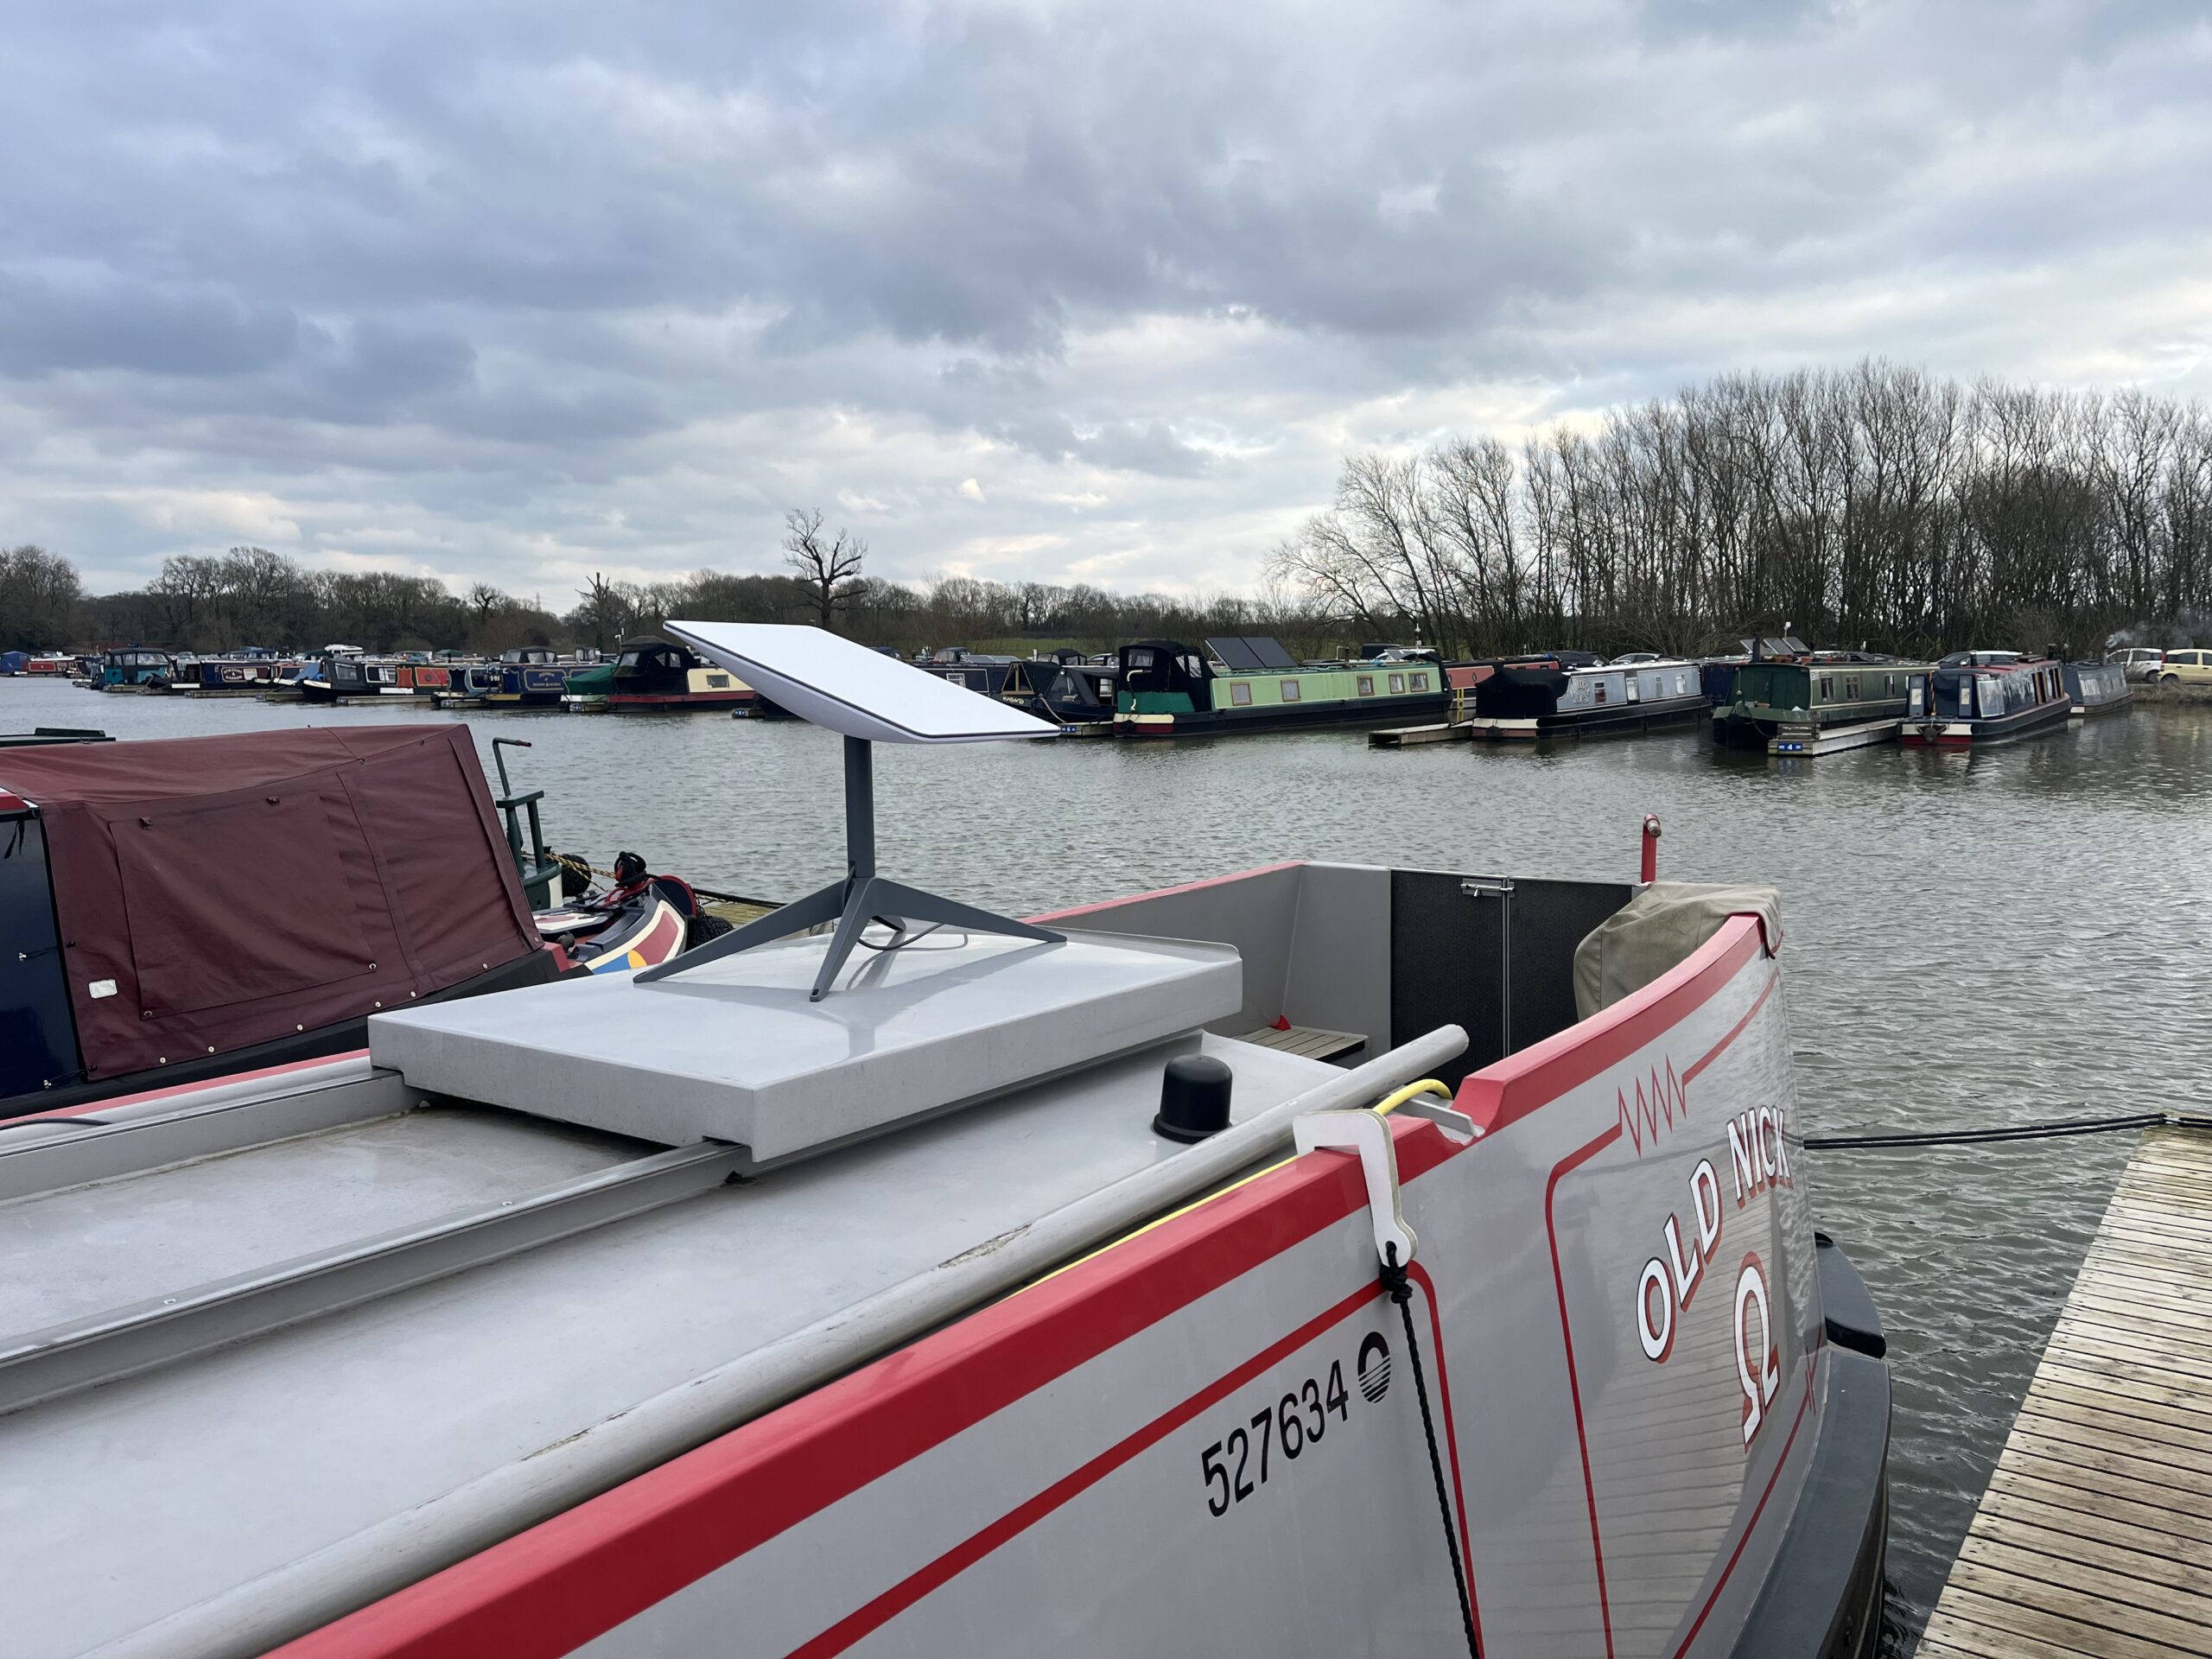
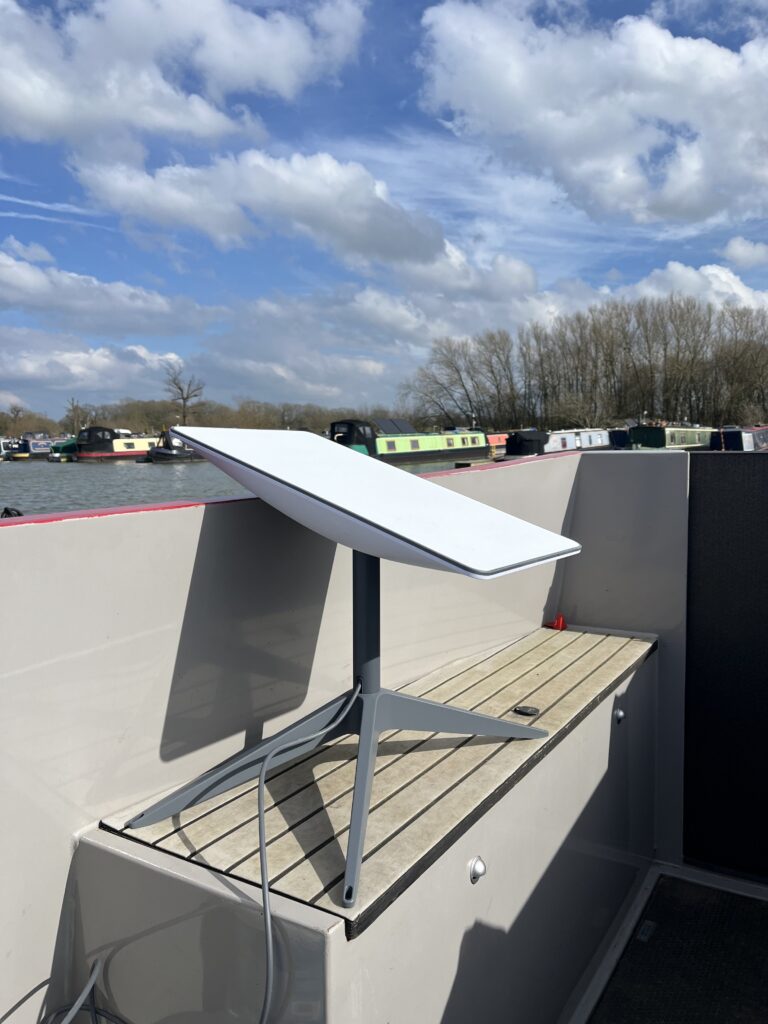
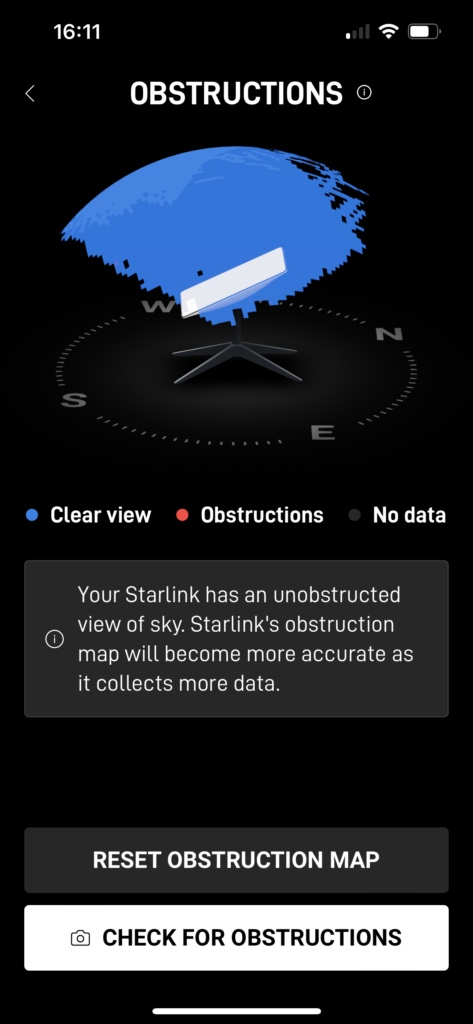
You need to make sure that the antenna has plenty of space around it, as the internal motors will spin and tilt it to get the best reception. Before you power it up, the antenna resembles a convenient (but costly) coffee table!
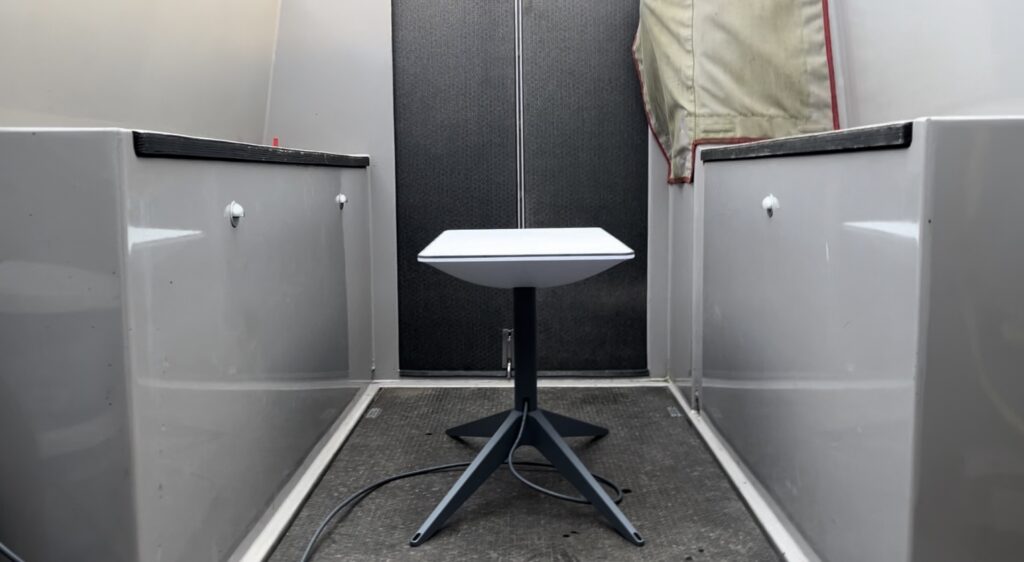
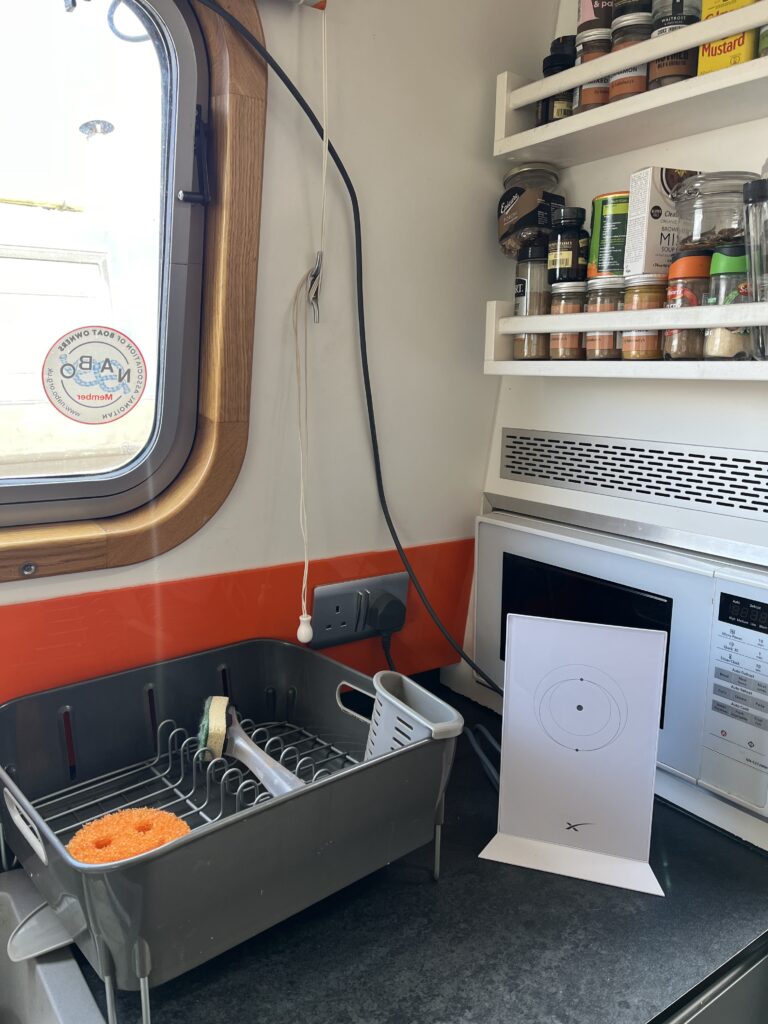
We set ours up temporarily on the stern deck and fed the cable in through one of the windows to the router that was sited by a power point next to the microwave. The App uses the camera in your phone to check the location for obstructions and then with power turned on, the antenna starts its search of the sky (takes about 30 seconds) and comes to rest in its optimum position. We then moved it up on to the locker so it was less in the way and the antenna will not move again until we leave the marina.
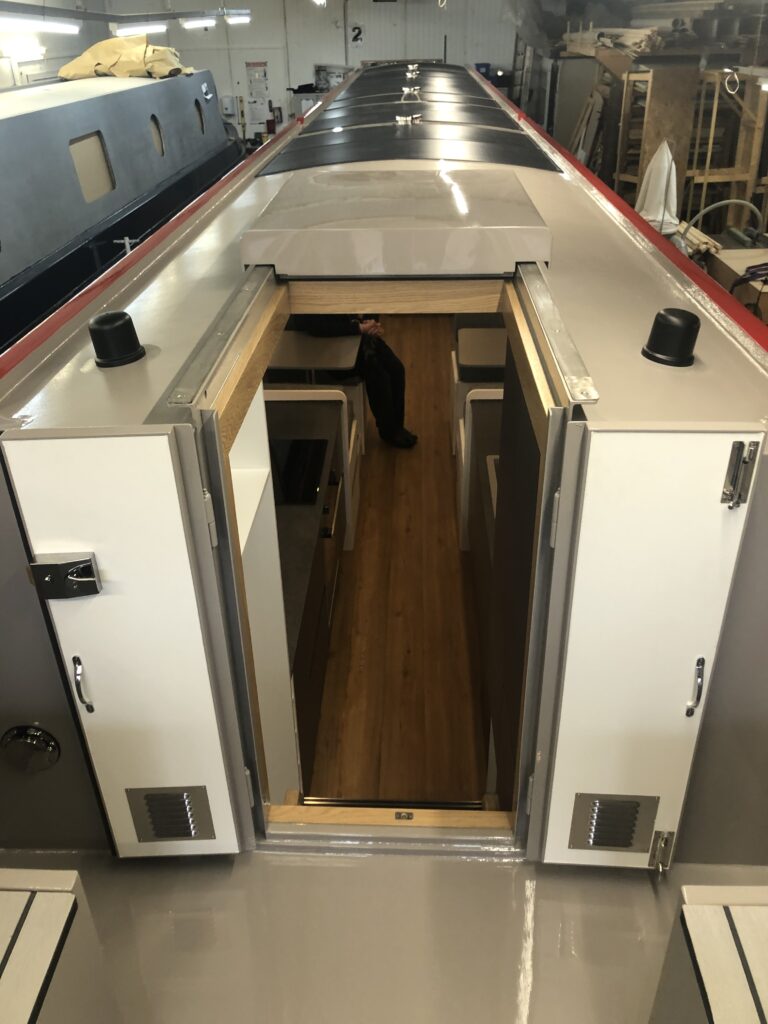
The reason why this post is going to be in two parts, is that we intend to temporarily install the system, as shown above, until a Starlink Ethernet adaptor arrives and I make a final decision on how the antenna will be mounted and reliably setup and removed when we are cruising.
The reason for the Ethernet Adaptor is to allow the Starlink to be connected to our 5GXtream wireless router, so that all of our other network devices (wired and wireless) can continue to work as normal with just a single wireless network able to provide 4G/5G or Starlink connectivity.
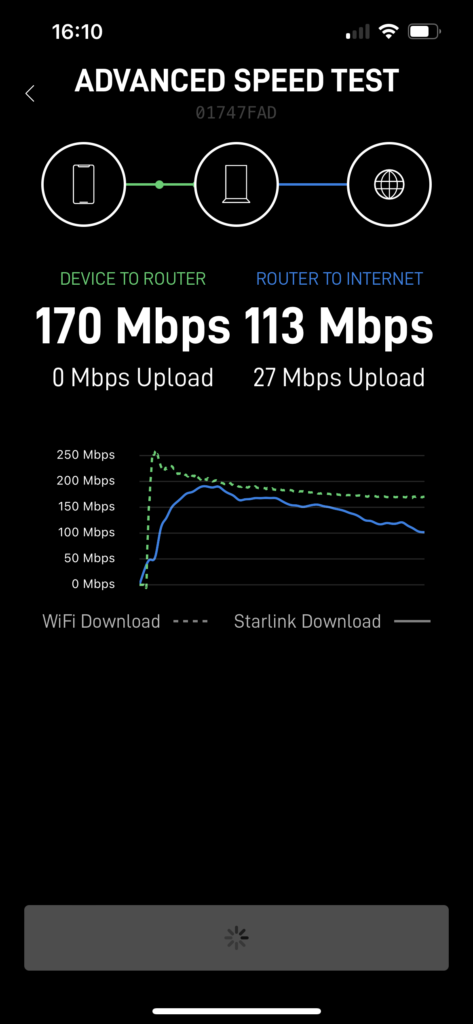
For now we will have to put up with the antenna on the locker and the router by the microwave, but even with this jury-rigged setup we are seeing a super fast and reliable connection, with speeds over 150Mbps allowing us to stream 4K movies, whilst both of us “double screen” with no stuttering or delays.
So that is all for now. The whole process of purchase, activation/registration and setup was much easier than expected and I will continue the second part of this post on mounting the antenna and hooking it up to our existing Ethernet network in part 2, but that will have to wait until after Electrika 2024.
UPDATE – click here to open Part 2 – which covers connecting to an existing router and introduces a waterproof connector for quick stowage and set up.
We’ve been looking at this for a while, but were concerned about setting it up and how it could work with our existing set up, especially as we’re not exactly ‘technical’
Looking forward to part 2…. 👍
If you decide to get one, we’ll (Paul!) be glad to help with set-up.
I’ve been trying to figure if the “Flat High Performance” hardware would be low profile enough to be able to have it as a permanent install on the rear hatch -bit too dear just to buy one to try it though 🙁
Hi Pete,
If I were you, I would wait for the Gen 3 system, which instead of having motors that move the antenna, has a much larger angle of view and does not need the pole mount – so can be mounted almost flat.
Best regards
PAUL
Very interested in how you find it if you’re ever out of the marina and under trees? I’m not in a marina, tending to cruise around and my favourite spots are often under trees! And yet the tagline to Starlink is “unobstructed” view of the sky. Have you been under heavy shelter/woodland with the boat and Starlink yet?
Also, I thought the £85 option was if you wanted the Starlink to work on the move, e.g. if van lifers wanted to use Starlink while moving at 40mph, but surely once moored up our connections are the same as houses/cabins that may use the £75 service?
Thanks!
Hi Lewis
We are out of the Marina, on the move, usually from April to November each year. The residential option is where it is only ever used at one location. The roaming option allows it to be used in any number of locations so had to be our choice. As an electric boat, we tend to avoid mooring under trees as we like to grab all the solar we can. However – at this mooring we detected no degradation of service.
Hi very good article ,I have not purchased my boat as of yet just paid 10% deposit while my house gets sold
I am very interested in the 1p 200gb per month deal you got as my mobile contract is up in August having paid for the phone .
At the minute even though my broadband is still with virgin and is out of contract they have upped my monthly fee from £36 pm to £65pm
Once I am nearer purchasing my boat October November then I will buy starlink ,seen decent offers in curry’s & costco
Also is gen 3 now available ,many thanks
Mark
Hi Mark – apologies for the delay in replying. Glad you found the article interesting. Good luck with your build. Very exciting.