
As promised, here is part 2 of our guide to installing and using Starlink on a narrowboat. Since publishing part 1, we have been enjoying very fast internet performance and the only downsides have been having to have two wireless networks on the boat (our existing 5G router and the Starlink router) and having a constant breeze through the galley window where we fed the antenna cable through.
Our plan had always been to integrate Starlink with our existing wireless router, which is a key component in the operation and monitoring of the boat. Also we wanted to make it as easy as possible to setup and stow the Starlink antenna, to avoid any risk of it being damaged or stolen.
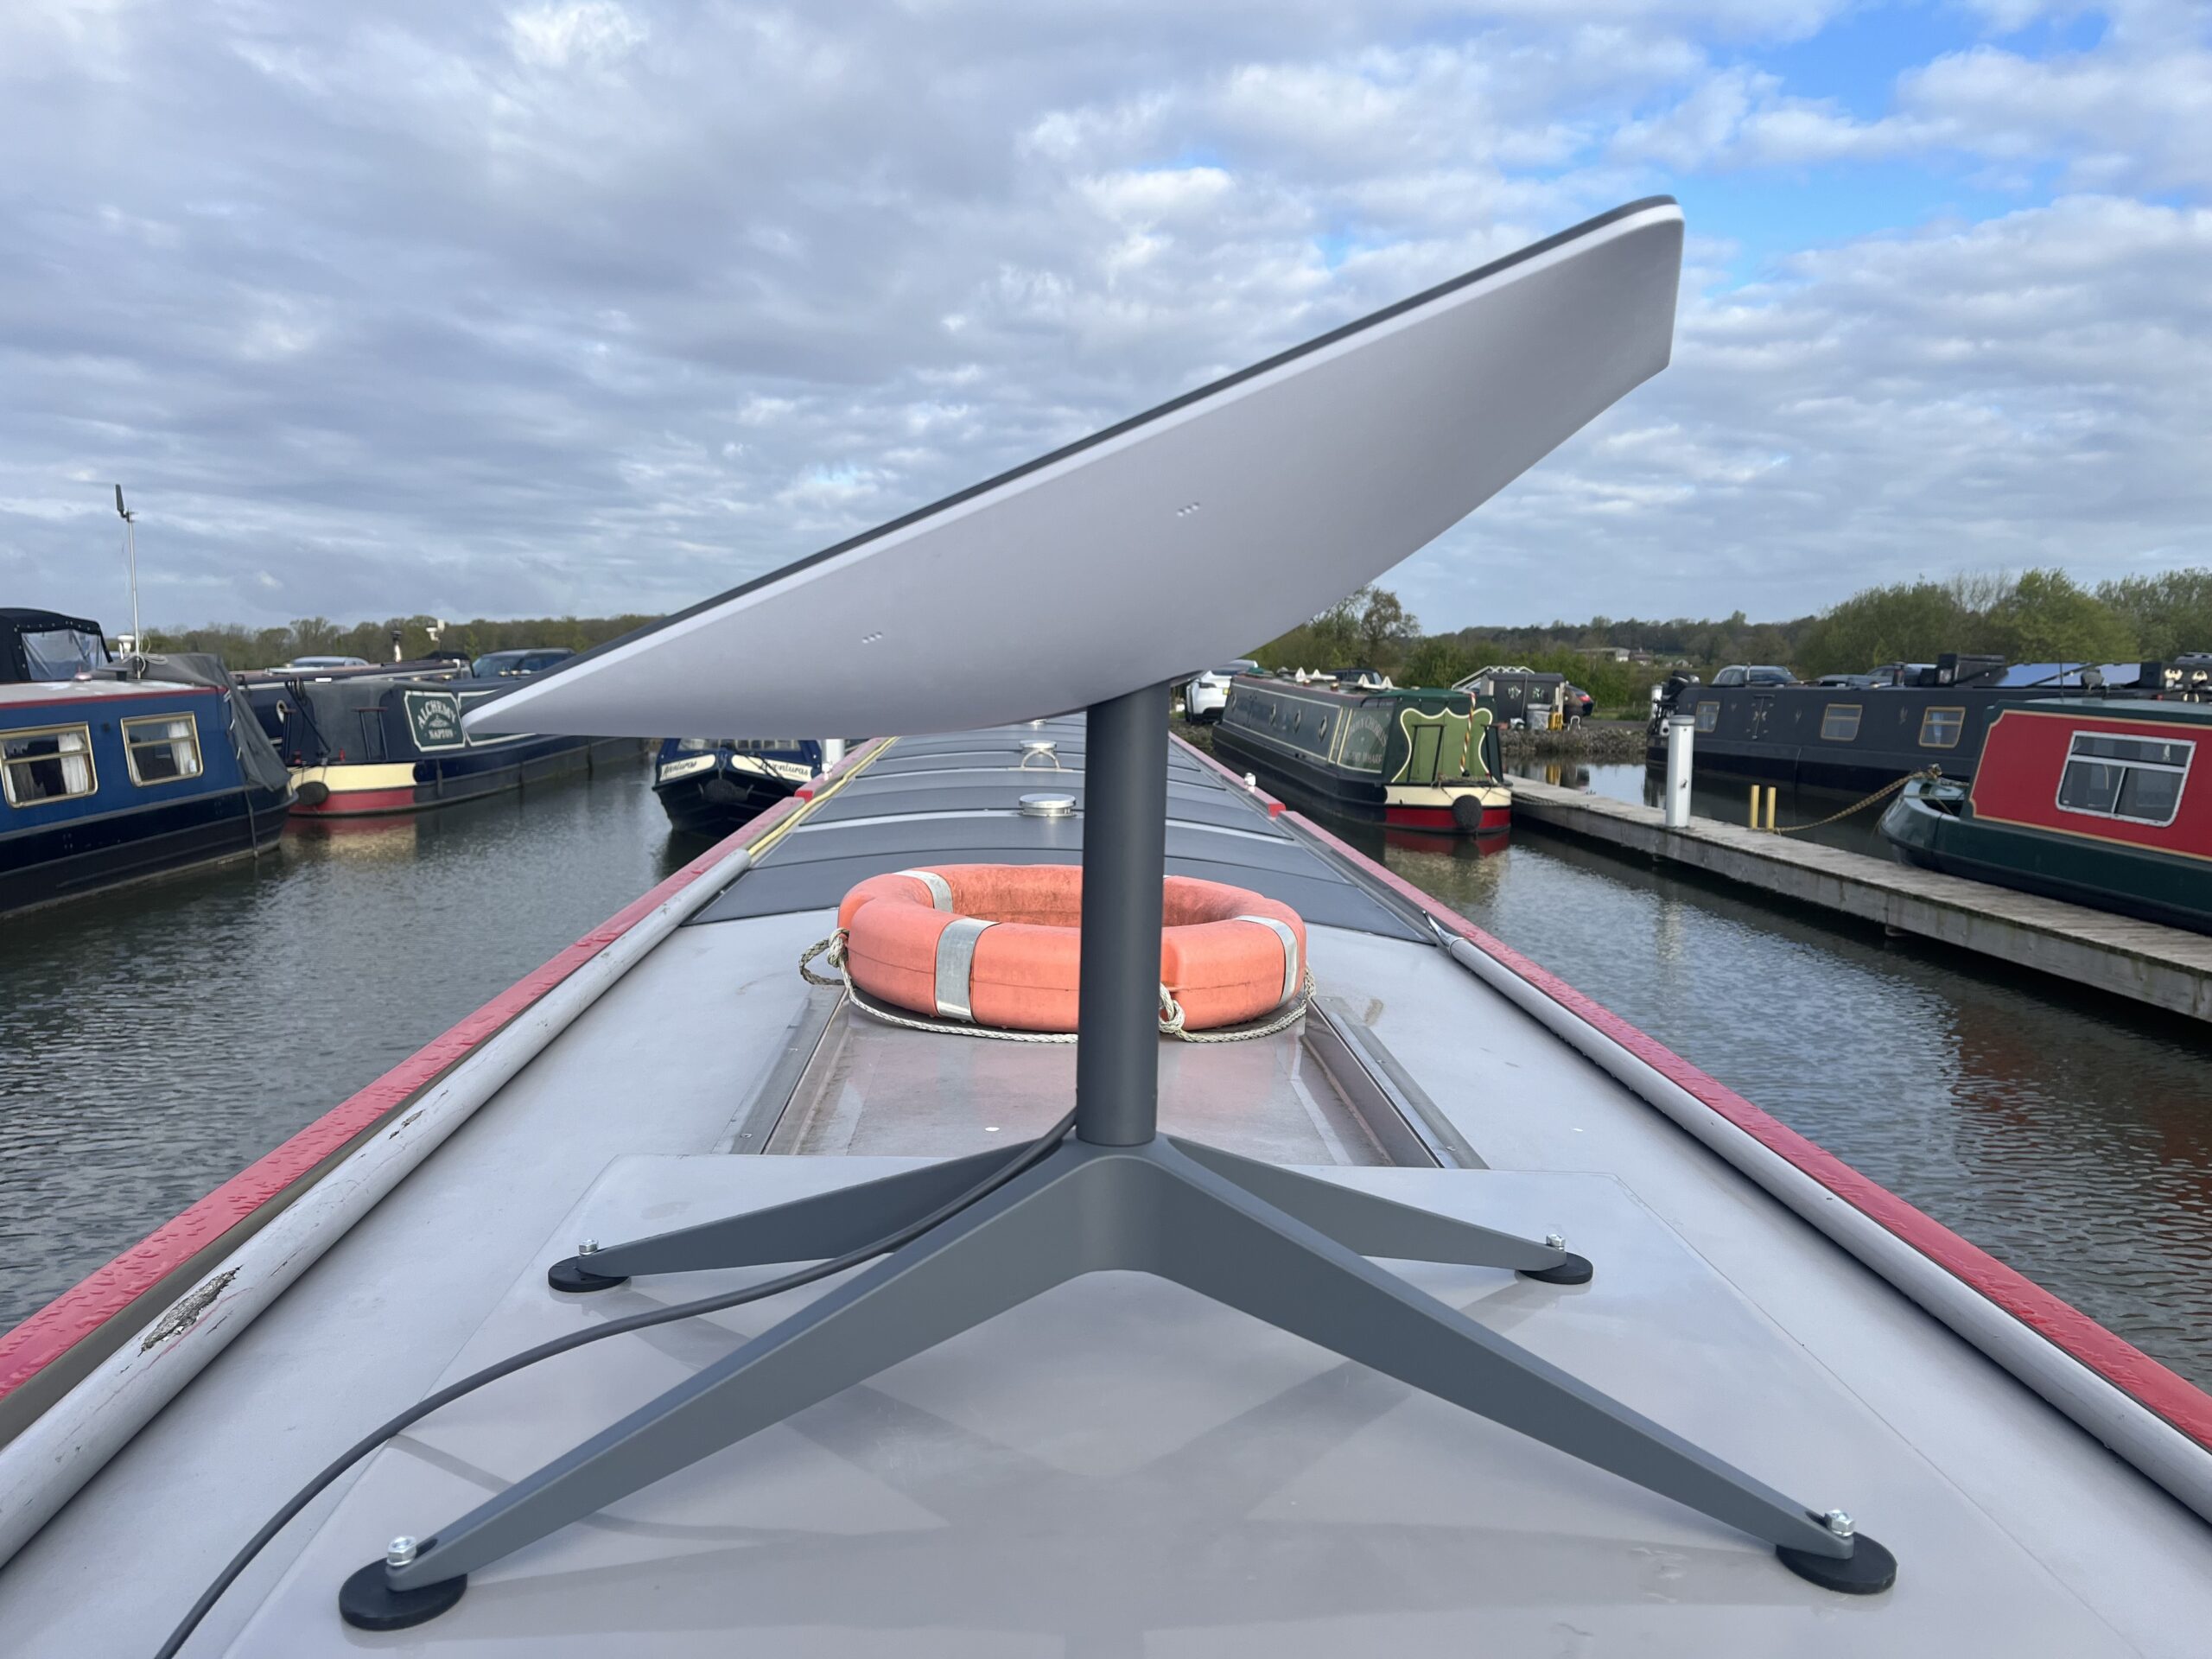
Mounting of the antenna on a steel narrowboat was the easy bit. We had already proven that a magnetic mount worked well with our digital TV aerial, so we just had to find a way to attach a suitable amount of magnets to the supplied Starlink antenna stand. A quick search on Amazon found a potentially suitable solution and in less than 24hrs we had a set of magnetic feet that bolted perfectly to the hole in each of the four legs – with two spares for our “come in handy” box.
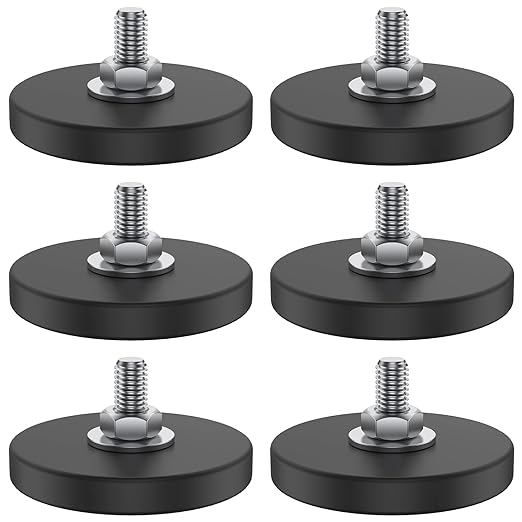
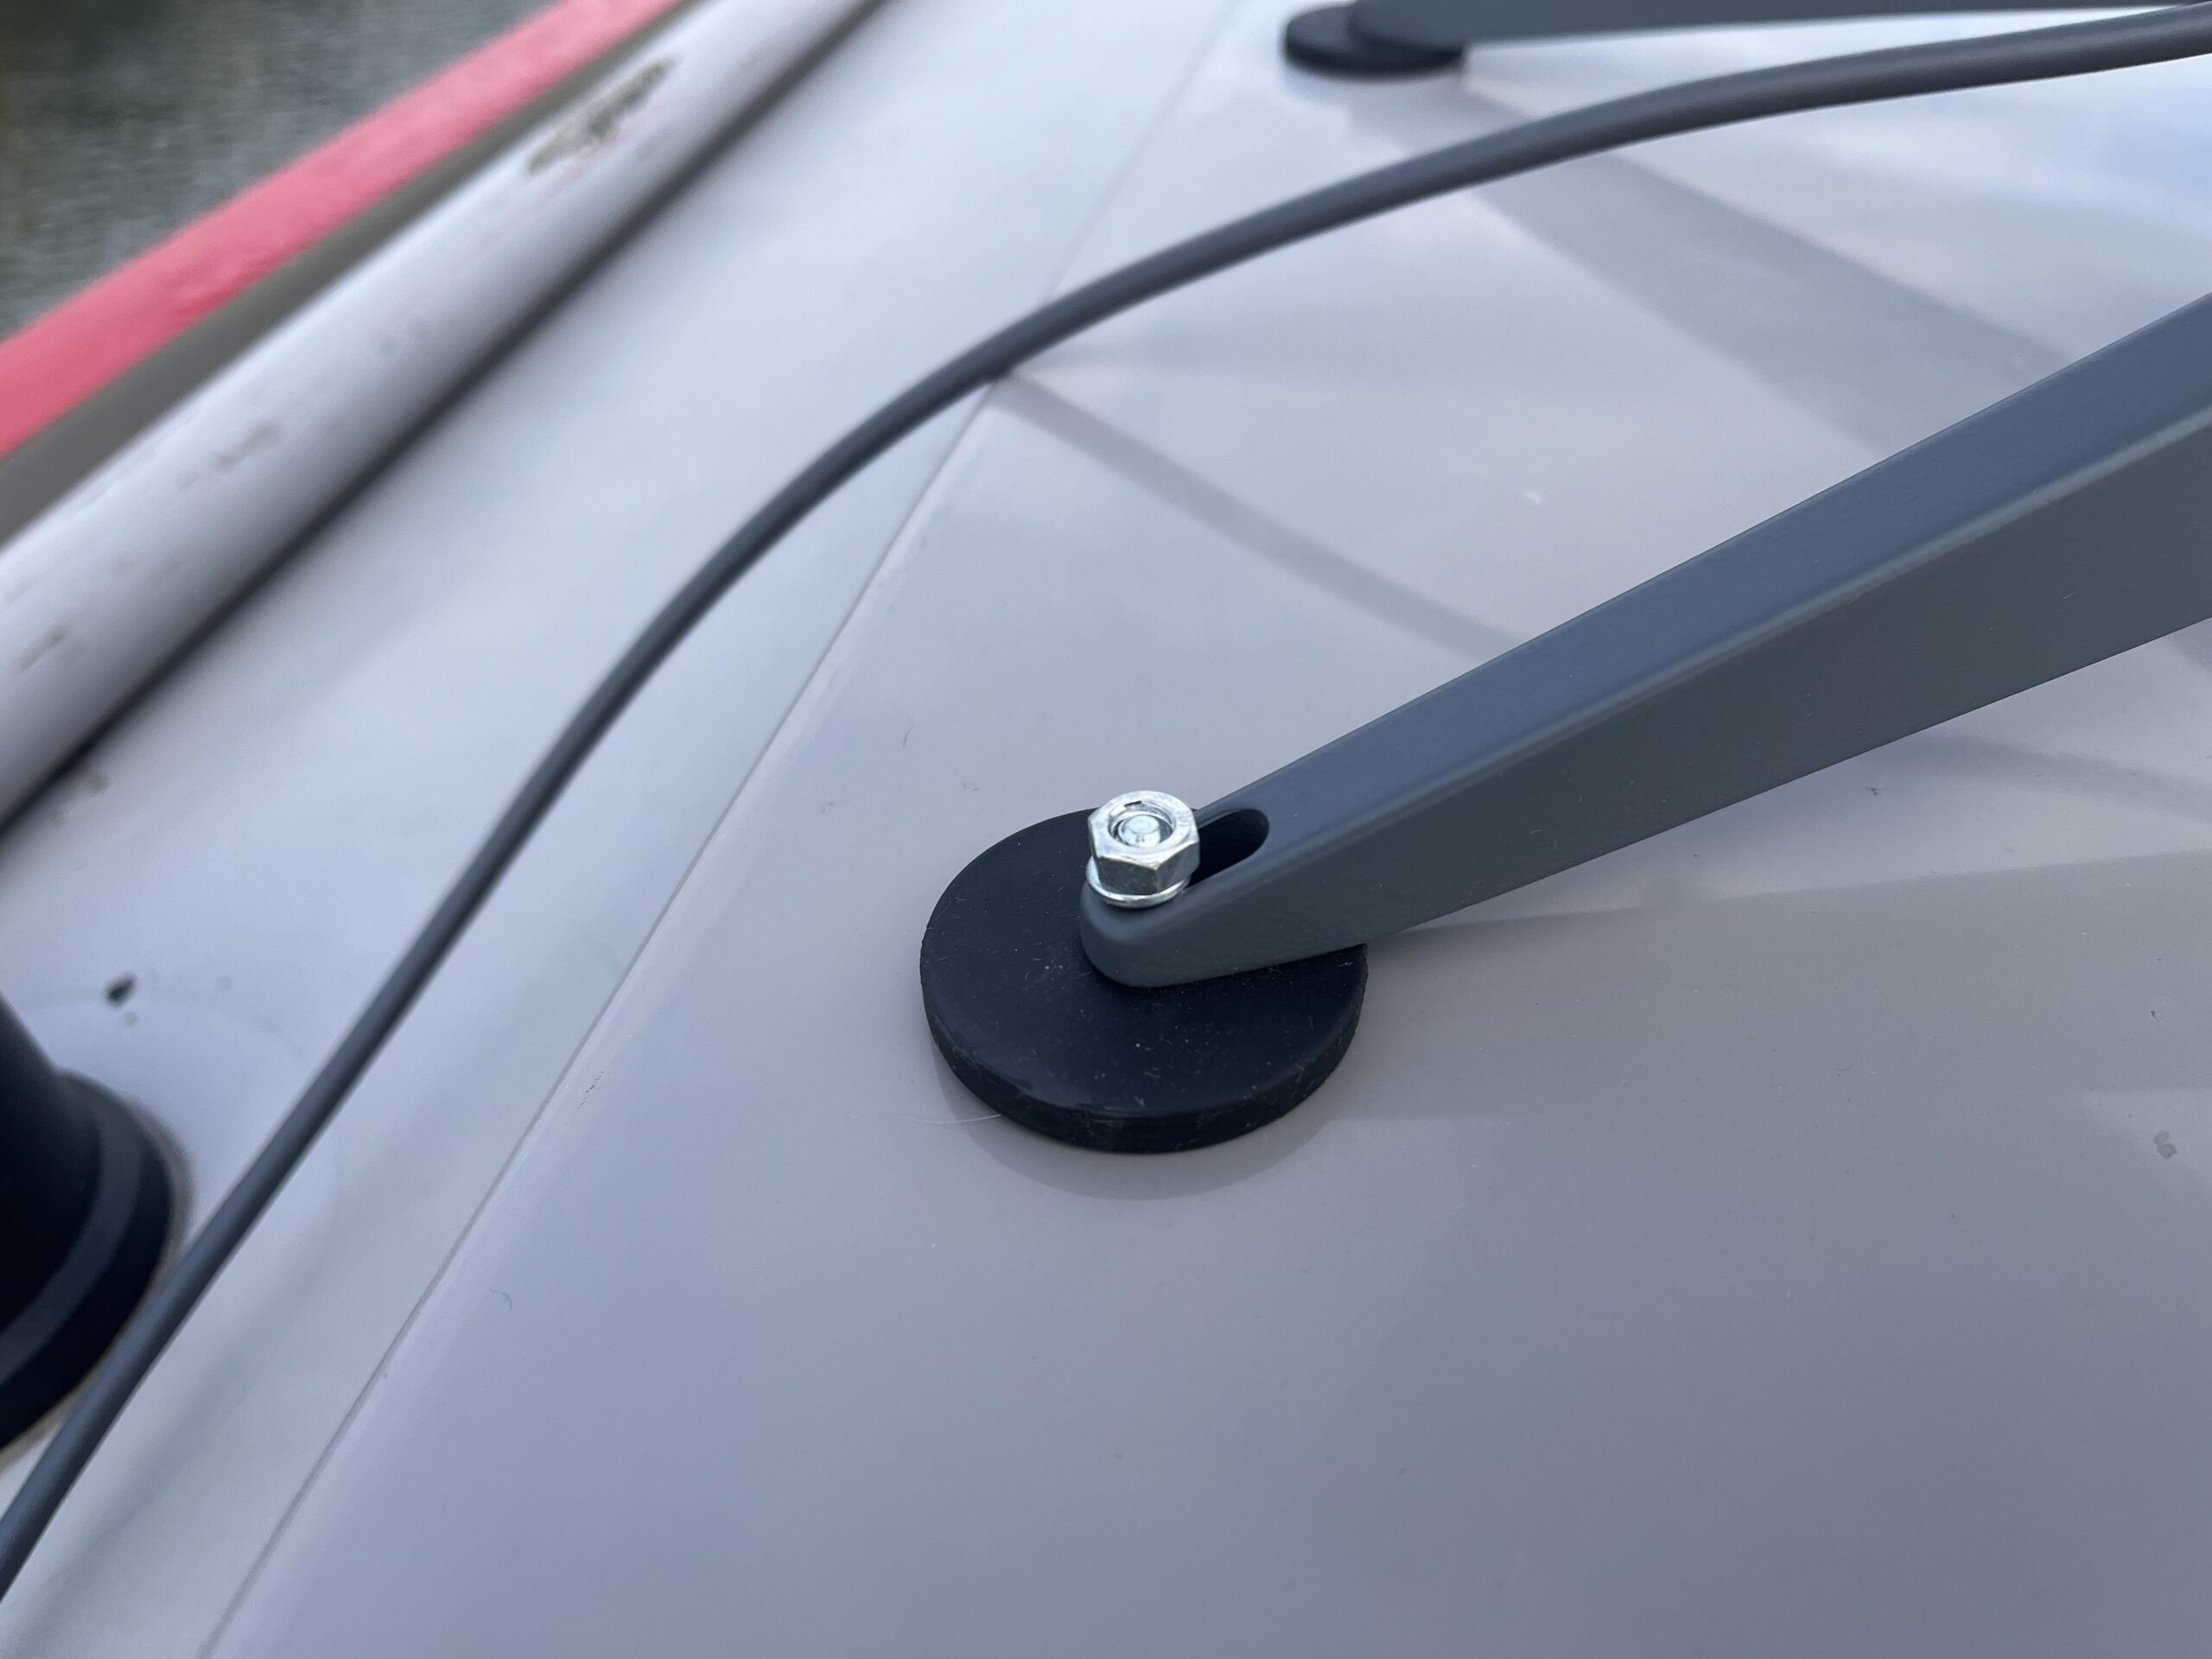
We have since had some pretty strong wind at Brinklow, which is renowned for its breezes, and so far the magnets have done their job and because they are rubber coated they do not scratch our hatch, which is where we have sited the antenna. Removing the antenna just requires a gentle pull upwards on two of the feet and then the other two feet come away very easily.
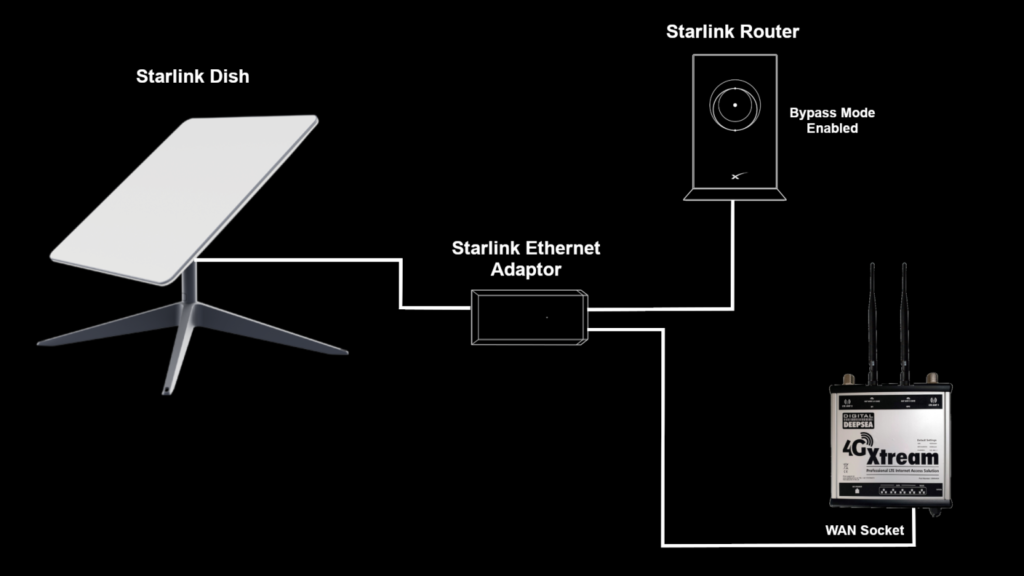
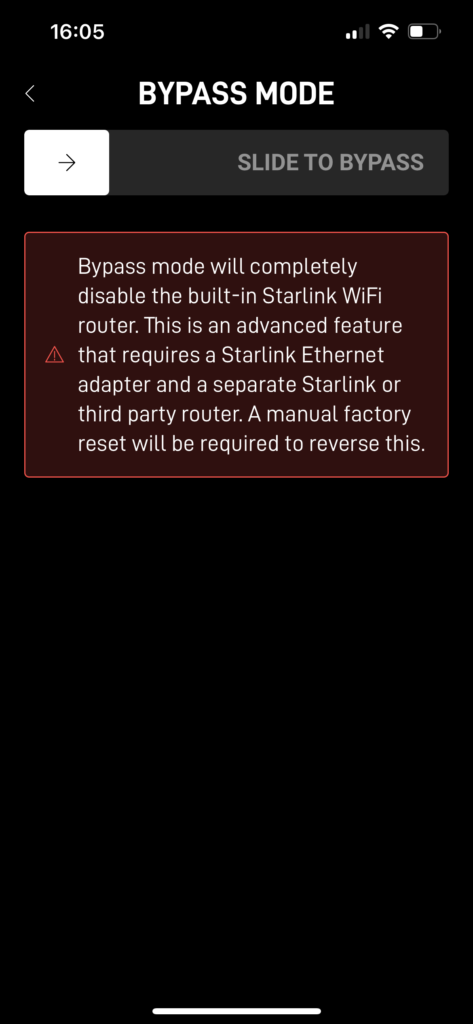
The Starlink Antenna can actually operate without using the supplied wireless router, but this requires a Power Over Ethernet adaptor (PoE) to power the antenna. A good compromise is to continue to use the supplied router to power the antenna, but to put the router in “Bypass Mode” where all of its router functionality is disabled and you can use a 3rd party router, like the 5GXtream we have onboard Old Nick to be the wireless router.
However, there were still a couple of hurdles to overcome. The first is that the Starlink router has no wired connectors to allow you to plug it in to our existing router. I believe this has changed in the latest Gen 3 Starlink system, but at the time of writing these were not available in the UK. So we needed to order an Ethernet Adaptor from Starlink for the princely sum of £35 including VAT and shipping. It arrived in a few days and needed to be installed as shown below.
The final hurdle was to find a smart way to route the Starlink antenna cable from the antenna outside on the roof to the Ethernet Adaptor which was to be located with the two routers in our tech cupboard. Normally cables on narrowboats come through the roof or external bulkheads via a waterproof gland, but one of our requirements was that the antenna could be quickly stowed when cruising or when we left the boat.
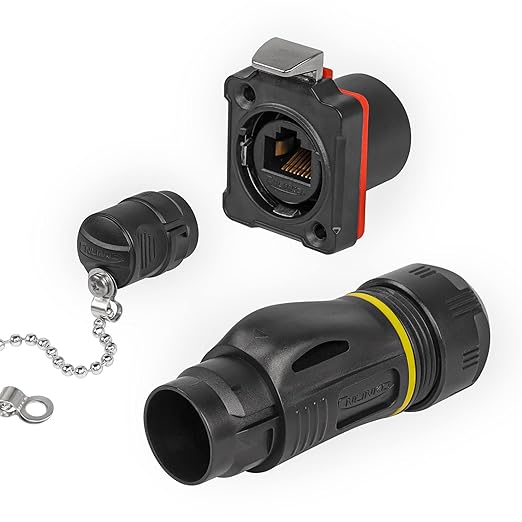
The Starlink antenna cable uses normal CAT5e networking cable and if we could find a suitable RJ45 connector then antenna setup and stowage would be very quick and easy. There are a number of different waterproof RJ45 connectors, but many are designed for panel mounting where the panel is < 4mm thick. A narrowboat bulkhead is typically 5-6mm so we needed to find a different type of RJ45 connector.
Once again Amazon came up trumps and we found a very cheap connector kit that included the panel mount connector (coupler), with a matching plug and even a waterproof cap for when the plug was removed. It seemed too good to be true and it was with some trepidation that I ordered one, but when it arrived, I was pleasantly surprised by its build quality.
The idea was to cut the Starlink antenna cable, remove any excess cable, and then fit two RJ45 connectors to the cut ends. The RJ45 connector on the antenna cable would then be inserted in to the waterproof plug and the RJ45 connector on the proprietary Starlink connector cable, would plug in to the inside connector of the panel mount coupler.
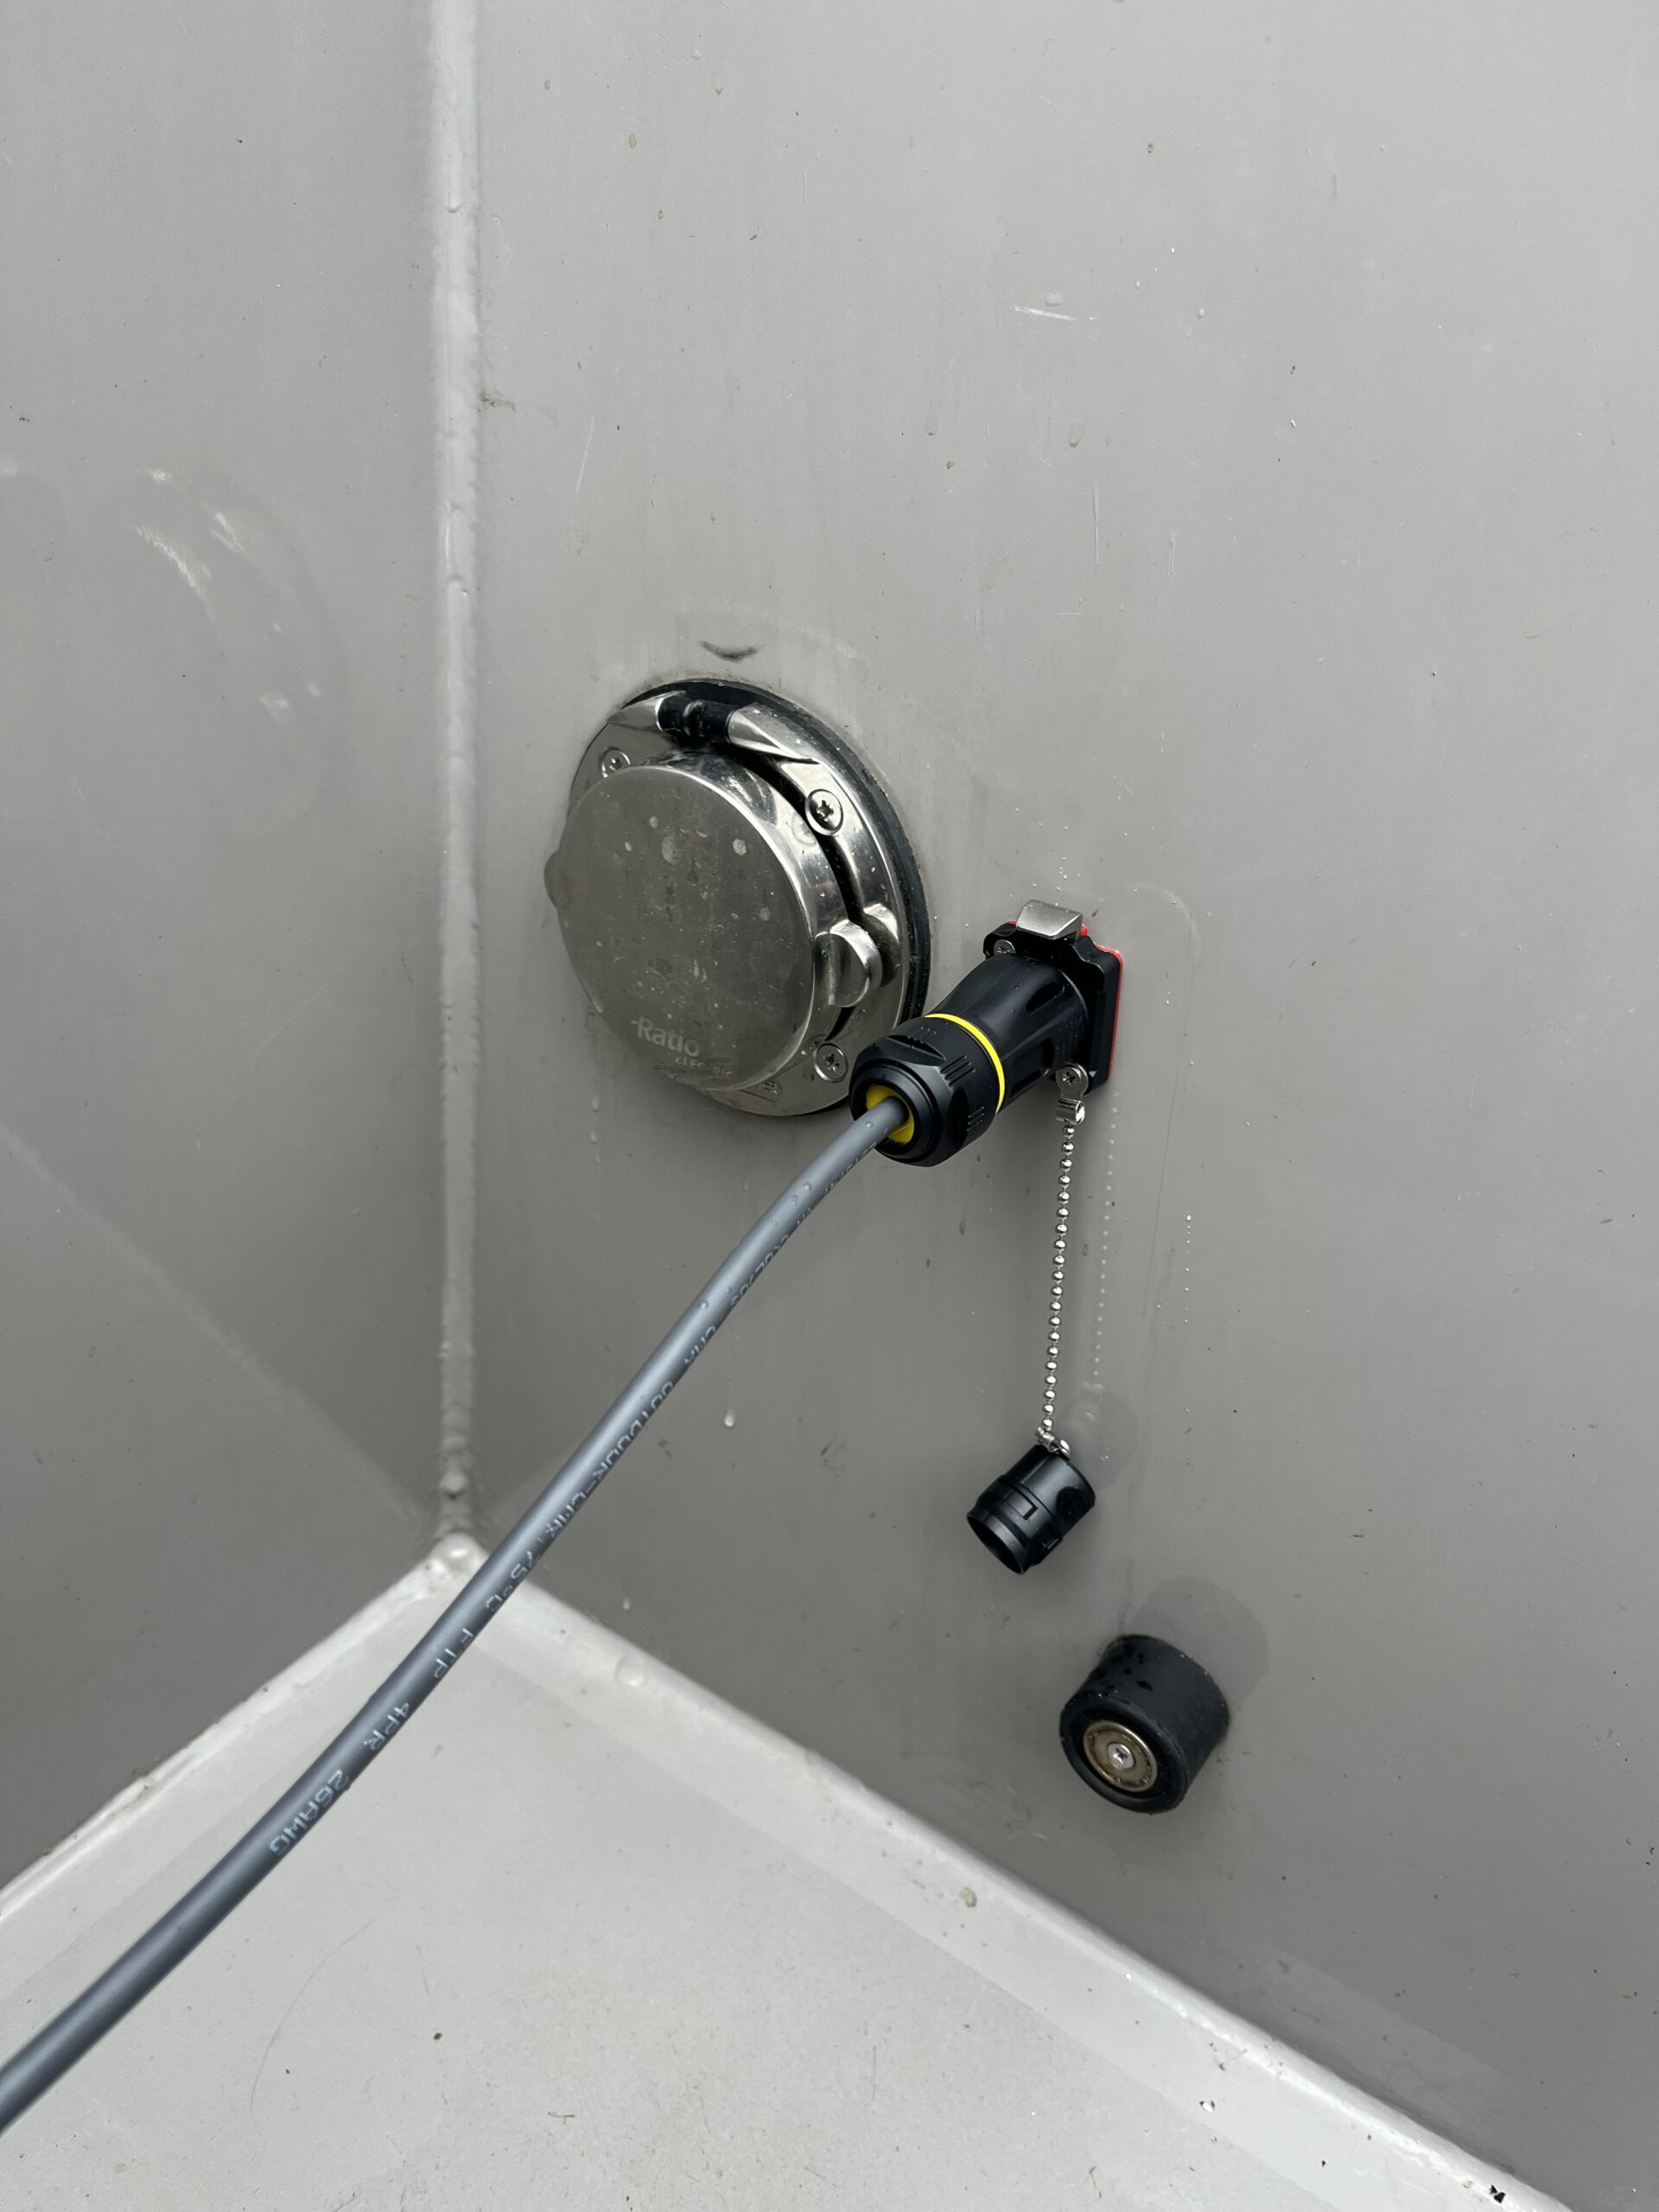
To make our plan a reality, Rob and Ian from Ortomarine who were visiting Old Nick to change our prop (the subject of a forthcoming technical post) kindly drilled the 24mm hole required for the panel mount connector and then drilled and tapped the two M3 holes for the fixing screws. Finally, Rob fitted the two RJ45 connectors. This was slightly fiddlier than normal, as the Ethernet wires were stranded rather than a single solid conductor – the norm for office networks – but we soon had everything assembled and plugged in.
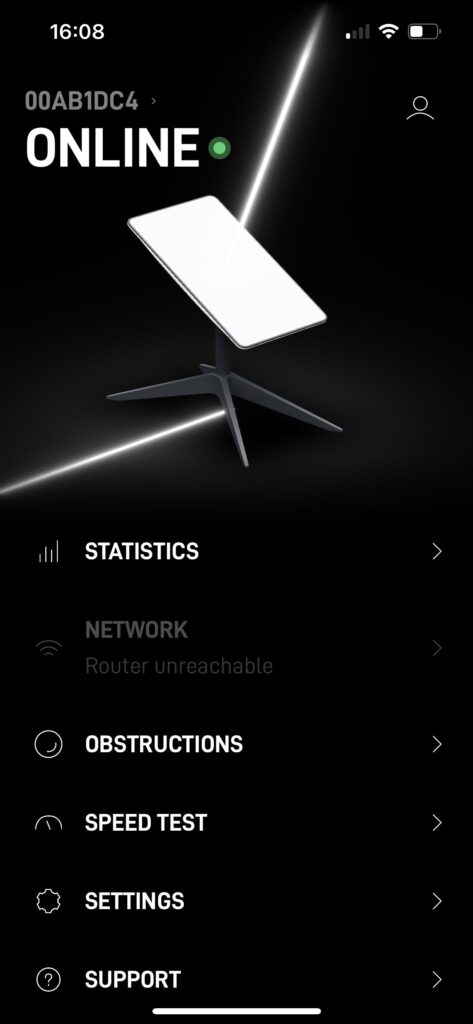
Then came the moment of truth, time to turn Starlink back on and see if it still worked. There are no indicator LEDs on a Starlink router or antenna, so the only option was to patiently wait for the wireless network to appear and then to run the App to see if everything was OK.
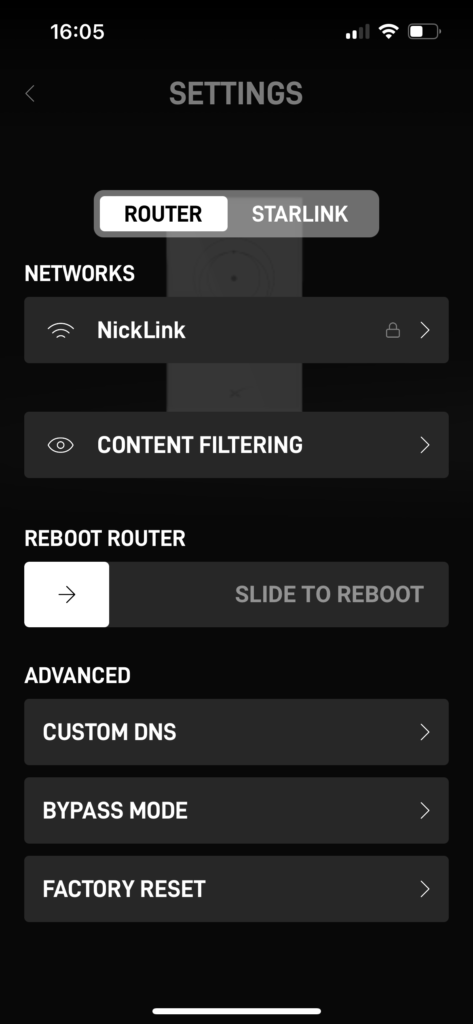
Hoorah…. Starlink came back online and I could see that our existing router was getting a wired WAN connection from Starlink – so far so good. The final step was to set the Starlink router in to “Bypass Mode” which would disable its wireless network and routing functionality allowing us to have just one wireless network (router) on Old Nick.
It was an immense relief to see everything working and I cannot thank Ortomarine enough for helping me get everything up and running and now we can look forward to super fast internet when we head to “the Far East” (Rive Nene, Middle Levels and Gt Ouse) which will be pretty rural. When we are not using Starlink, our router will fall back to using 4G/5G and we will have the confidence of always being connected.
If anyone has any further questions, please post them in the comments below and I will do my best to answer them.
Brilliant, elegant install and very helpful. I’m sure Starlink is in our future as well. Am I correct in reading that your antenna is not Gen 3? If not, why?
Thanks!
Hi Tom iIt’s Gen 2. A – because it was on special offer and B – because Gen 3 is not yet available in the U.K.
Thanks. Thought Gen 3 was available here. Guess it’s good I’m waiting a bit.
A suggestion (after two seasons of cruising experience with Starlink on the hatch). Leave enough cable on top to allow rapid movement of the dishy to the deck in the event of meeting an unexpected low bridge etc. We’ve scrambled to save Starlink a couple of times exiting locks and on higher than usual rivers. Cheers!
Thanks Andy. Being seasoned boaters, we’ve allowed plenty of cable for exactly those reasons!
The setup looks amazing however I do have a couple of questions, once which I will probably answer myself in the asking. Is the reason you take the starlink down during cruising because of headroom as the roam package allows you to move up to 15Mph before reception fails. And secondly, could you not use a standard Power over Ethernet (PoE) injector which supports up to 30W? TP-Link to a pretty good one.
Hi Neil,
I think we will keep the Starlink up when we on wider canals and rivers, but on narrow canals when you end up being forced in to a tree, it is just another thing to worry about, when you should be concentrating on taking avoiding action!
Also in towns and cities we will probably take it in at night, as it is just another attraction for less savoury types.
I did start investigating using a 3rd Party PoE adaptor and running it off the boat’s 48v DC system, but with Electrika and getting ready for our summer cruise, I took the easier option of retaining the Starlink router and using this as the PoE supply. Perhaps a project for next winter!
Best regards
PAUL
Great info thanks. Just wondered if you did not need internet whilst the boat was moving could you not use the £75/month residential subscription instead of the 85/month roam subscription.
Hi Andrew,
So sorry for the long delay in me answering.
As I understand it, the residential service limits your access to the StarLink network to just one location which the system remembers. If you then move to a new location (say moving house) you can change the address but if you are regularly changing location, then you will need the Portability Add-On or to change to the Roam service where you can use it in as many European locations as you want.
Starlink Roam seemed to cope very well with us moving around at 4 MPH and we regularly used it whilst cruising on the Thames. On narrow canals with overhanging trees the number of dropped connections makes it impractical and we switch back to 4G/5G.
Hope this helps.
Best regards
PAUL
Hi
Very good article. Thank you.
I have just tried setting mine up with the Ethernet adapter and CAT5e connected to my EE Router. When I put the starlink in ByPass mode, it seemed that the EE router was still trying to access thr Internet using the SIM card and not the Starlink dish. I got really bad speeds.
Basically, it seemed the EE router I have was still trying to use the 4G/5G network rather than the Starlink.
Any thoughts would be appreciated.
Kind regards
Mike
Hi Mike,
Apologies for the delay in reply and hope it is still of use.
Your EE Router will have a WAN priority setting or Fall Back option where you can set the priority of which connection to the internet you wish to use.
The way we have it set, is that Starlink (Wired WAN connection) takes priority and if not available, our router “falls back” to using the EE Mobile connection. Then as soon as Starlink is available again, the router will go back to using it in preference to the EE Mobile.
Hopefully, when you start exploring the web interface of your EE router, it will be obvious what setting needs to be made, or I am sure there will be examples online.
Best regards
PAUL & KAY
We are about to get a Starlink gen 3 for our narrowboat, but it is aluminium so magnetic mounts don’t work.
I’m very happy to silicon a magnetic mount onto the roof, and or screw / rivet if that works, but it’s not clear to me whether these mounts allow you to adjust the alignment to get the best signal when you change locations. Do they do this, and do you have any recommendations on security?
Tx in advance
John Sharman
Hi John
Adjusting alignment is not an issue for us as the Gen 2 does it automatically. We remove ours for cruising – just in case of bridge hole issues. I don’t really know how to advise you on your issue.
As regards security, we leave ours out all the time we are not cruising. If we were going to leave the boat for any period of time, we’d do a quick risk assessment of the area and stow it if we were uncomfortable.
Hope you can find a workable solution.