
This weekend I serviced our Vetus GLX6.5SIC generator again. If you are a devoted reader of my technical posts (one of the few!), then you will remember that in my original post on servicing the generator, I covered most of the steps of a full generator service. However, there was one important step that I did not mention and that was changing the impeller, so I thought a short post on how to do just that, was called for.
In a diesel engine, the impeller plays an important role in pumping the water coolant around the engine as expertly demonstrated by these two Jabsco engineers in this video…
Depending upon how your generator is cooled, either by raw water or closed loop “skin tank”, the impeller will either be pumping water from the canal or a mix of distilled water and anti-freeze. The silt and material in the canal water will decrease the life of the impeller, so it is recommended to change a raw water impeller every service, while with a “skin tank” impeller you can probably get away with every other service.
An impeller is a pretty cheap spare part and it probably takes 20mins to change it, so it really is a false economy not to change it regularly. The blades of an old impeller can break off and get stuck in hoses or heat exchangers, possibly causing much more expensive and serious problems.
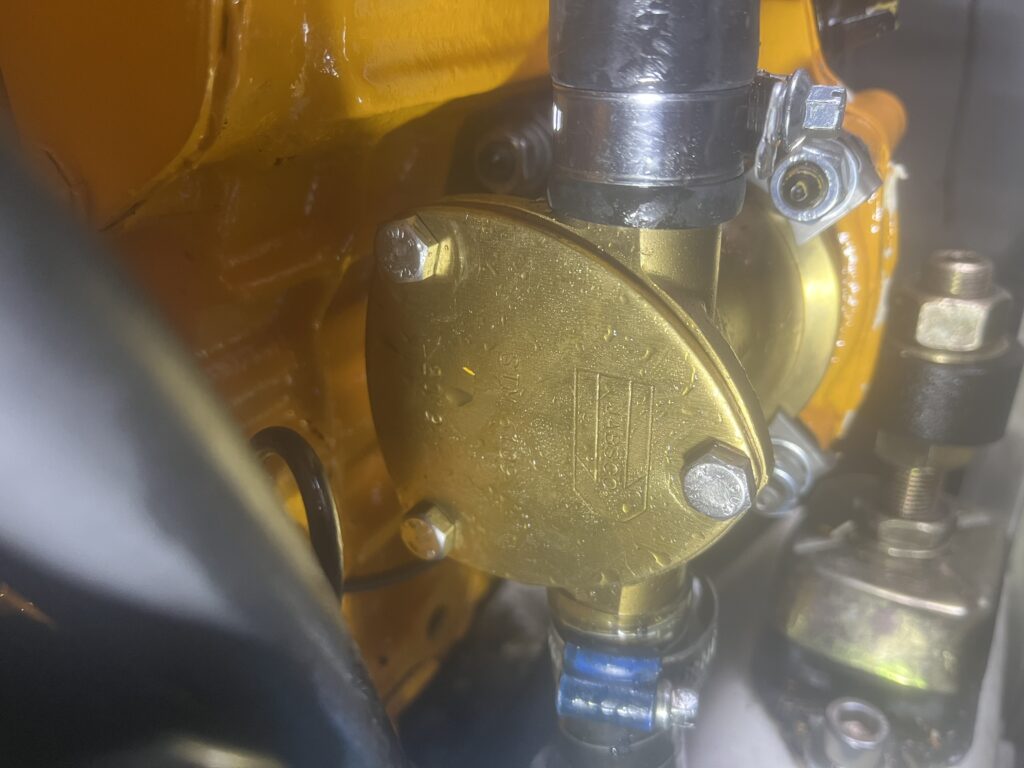
On our Vetus GLX6,5SIC generator, the water pump is located on the front of the engine, to the right of the Oil dip stick and is fairly easy to access. You will require a 10mm spanner/socket to remove the three bolts, if you have this or a similar model and also an old towel to catch the water that will invariably drain out of the pump.
IMPORTANT – if you have Raw Water cooling, make sure that you close the inlet valve so more water does not flow in and if you have skin tank cooling, close any inline valves that have been fitted to isolate parts of the cooling circuit.
With your old towel in position to catch any drips, start removing the three M10 bolts that hold the access plate in position. In all the excitement, when the water starts to drain out, be careful to keep hold of the bolts to avoid them ending up in the bilge.
The three bolts are the only things holding the access plate in place, so be careful not to let that fall off or the rubber O ring seal that might be attached to the plate or sitting in its groove.
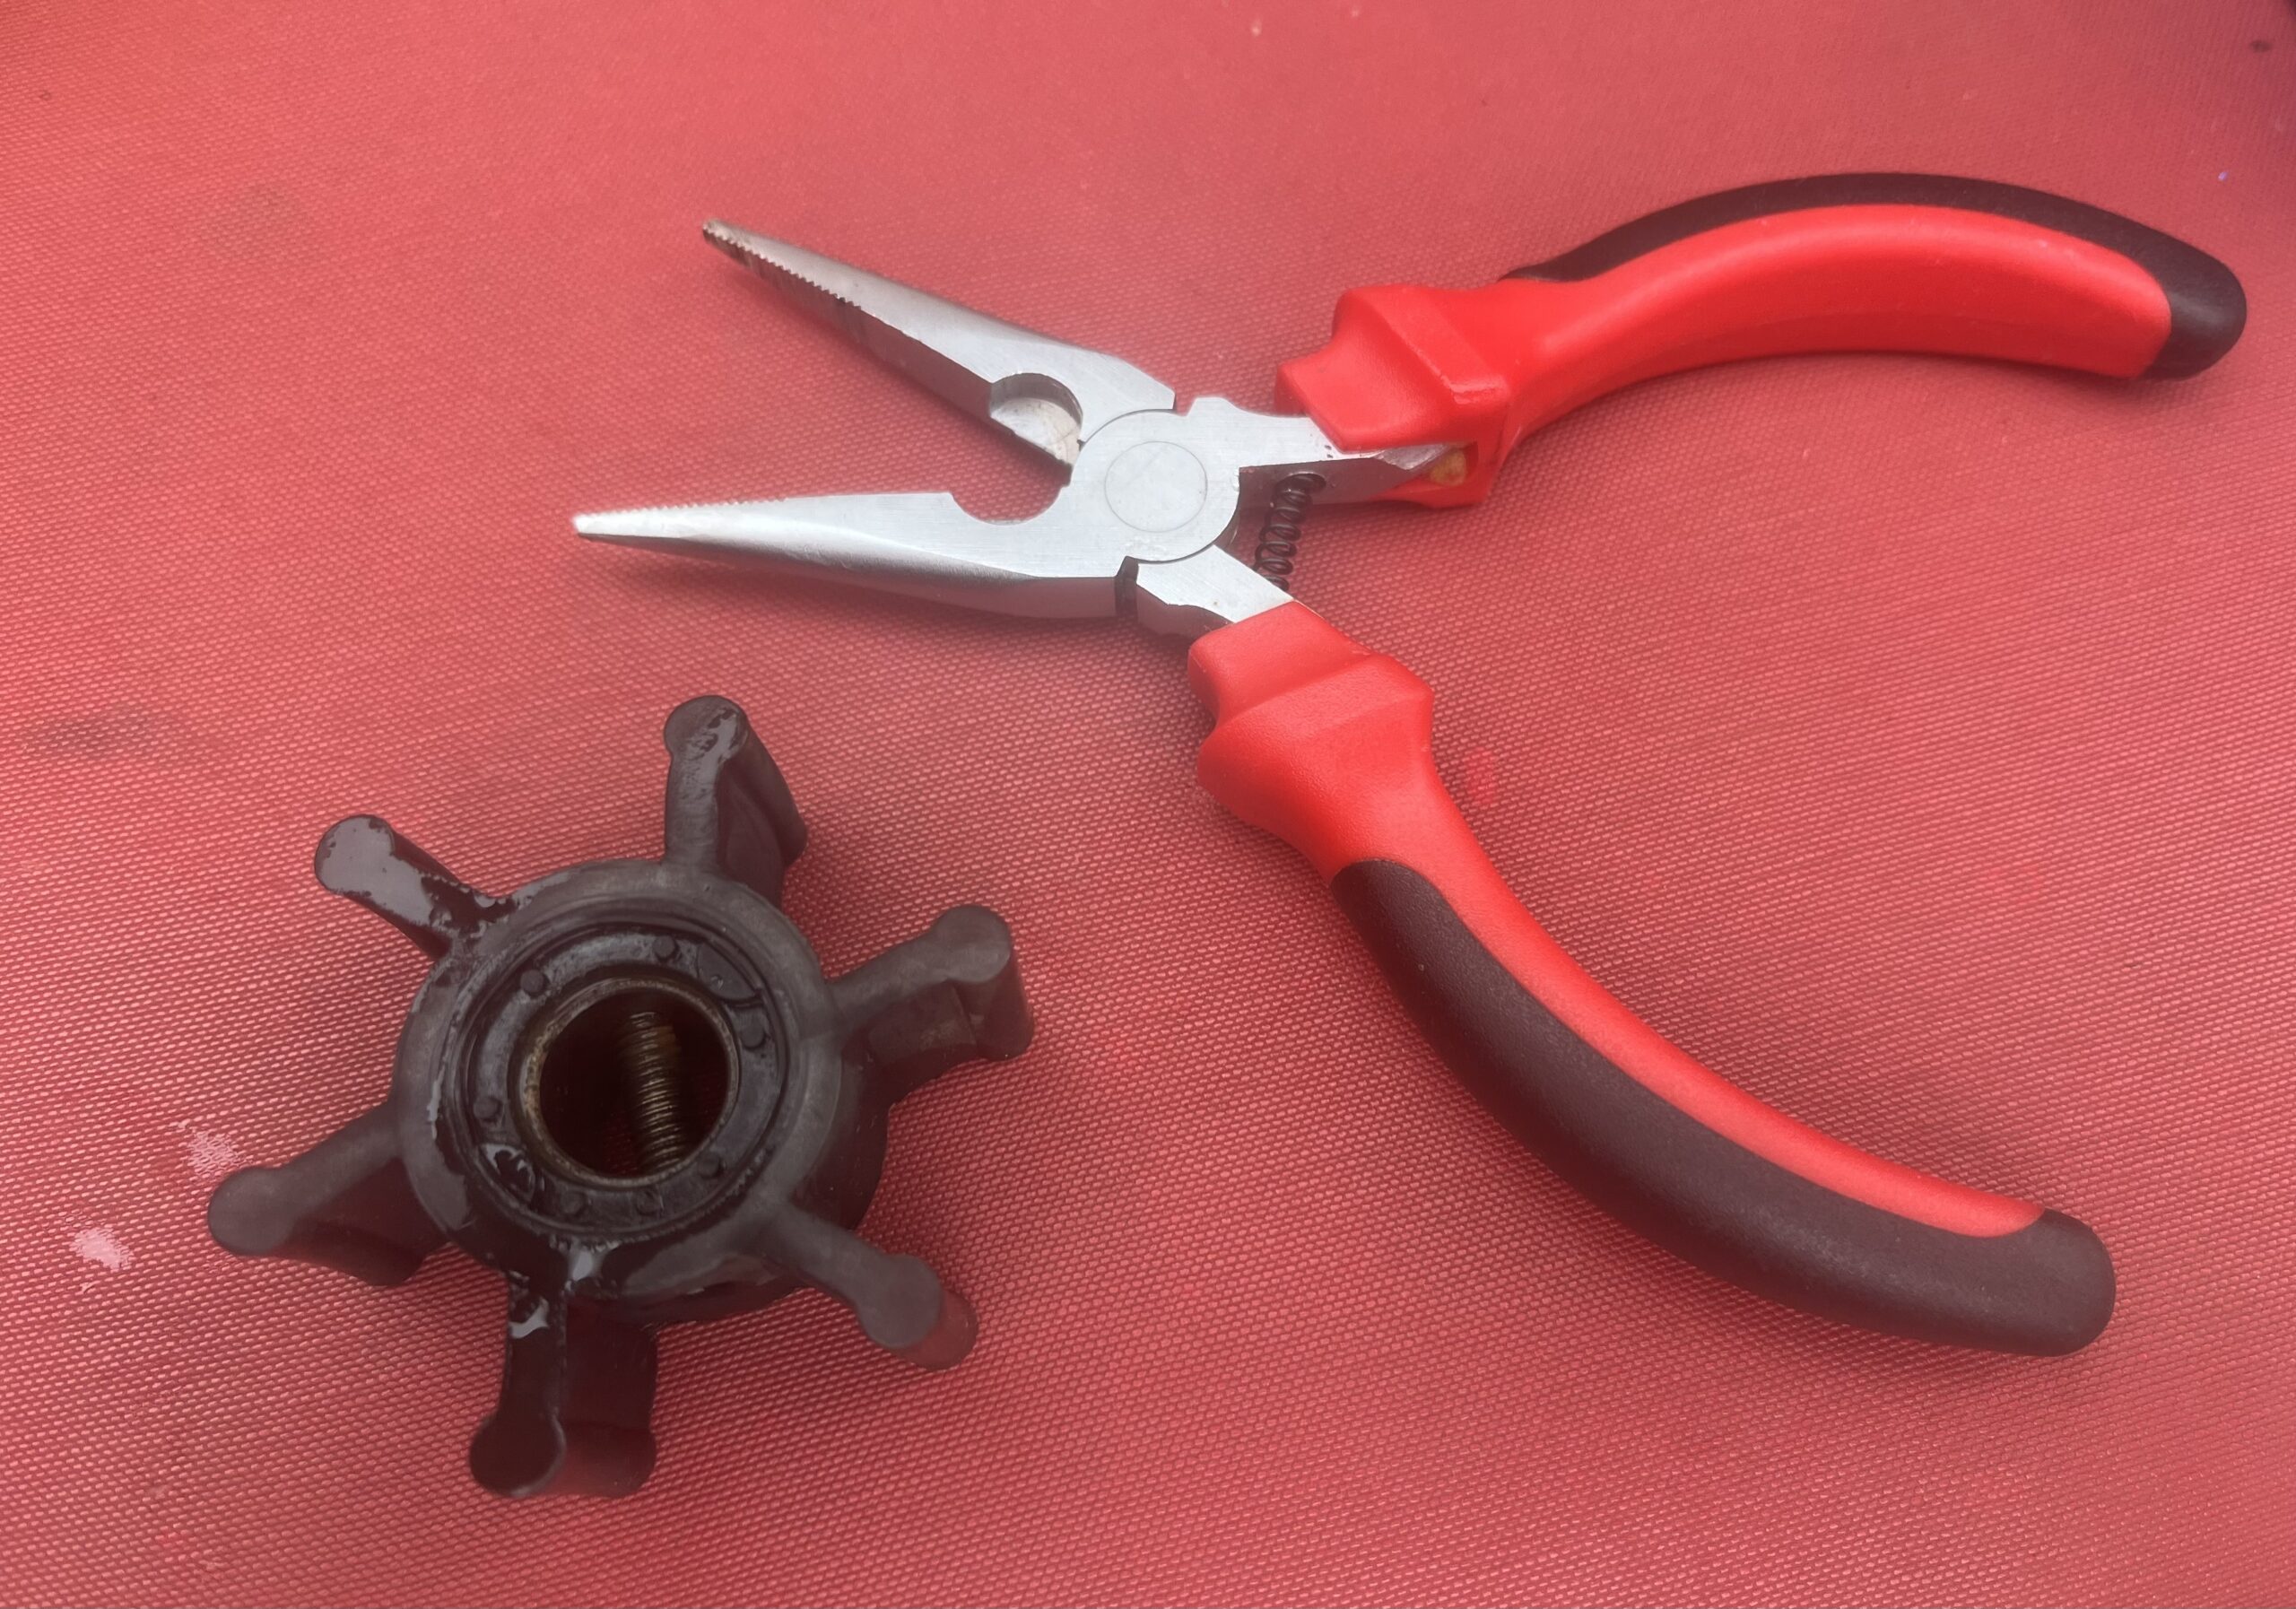
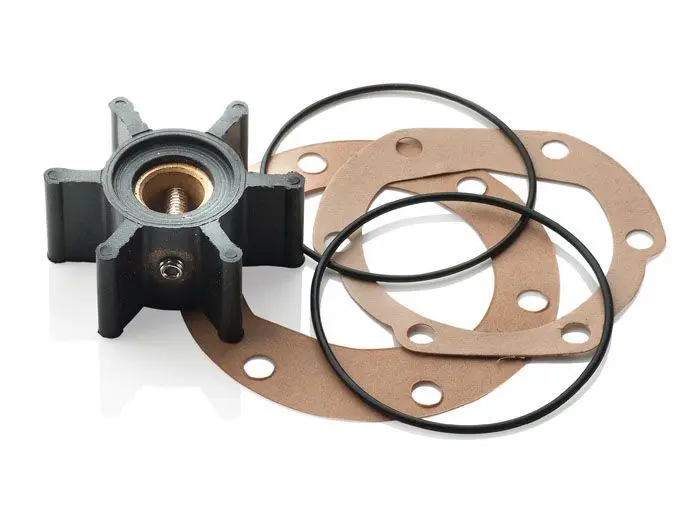
Once the water has drained off and the three bolts, access plate and O ring seal have been removed, you can pull the old impeller out of the pump housing, using a pair of snipe nose pliers – as shown in the featured image at the top of this post. It is just a friction fit, but does need a bit of force to pull it free. Once removed, grab the SMT8076 Vetus Impeller Kit, which includes the parts for a number of different pump models. For the GLX6,5SIC you just need the larger of the two O rings, the impeller and the tube of lubricant.
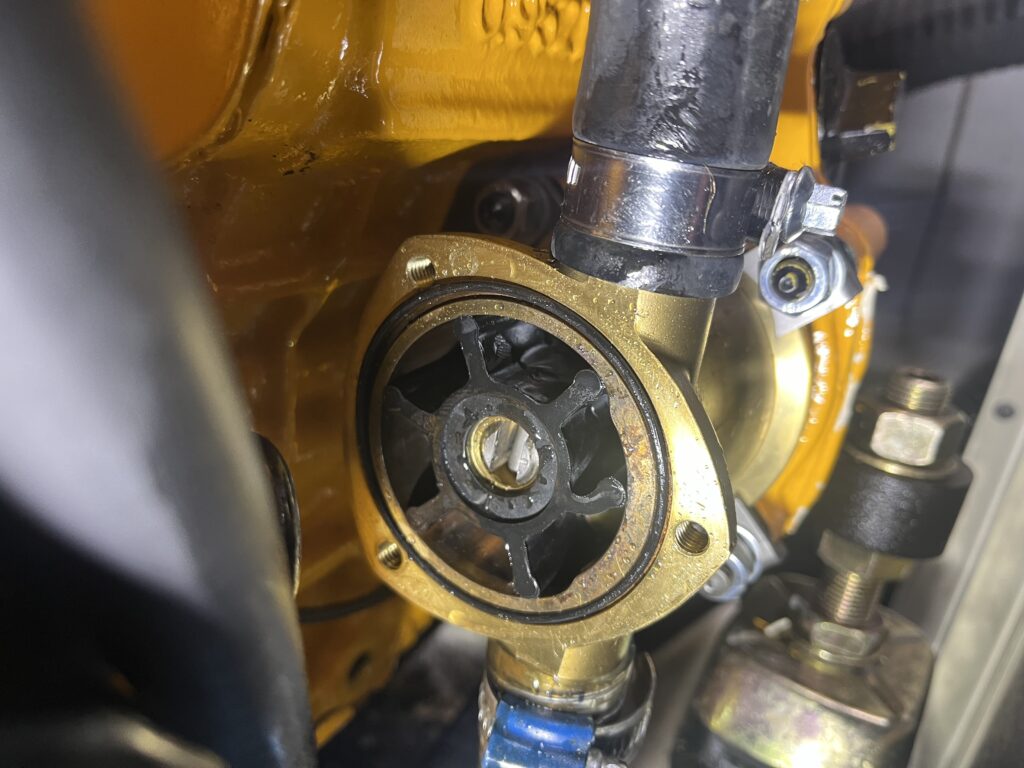
The first thing to do, is to use your fingers to feel what angle the “U shaped” slot in the impeller shaft is located on the pump. The bar in the impeller needs to sit in the “U shaped” slot and it is easier to line them up before you start pushing the impeller in to the housing.
The next step is to thoroughly “lube up” the impeller using the supplied lubricant. Don’t skimp, dollop all of the lubricant in to the palm of your hand and then roll the impeller around between your palms making sure that every blade and face of the impeller is covered in lubricant.
Now line the impeller up and start pushing it in to the housing, you might need to bend each blade slightly to get them all in. Once fully inserted, place the new O Ring in to the groove on the face of the pump housing and bring the access plate (which should have been cleaned and lubricated) into position ready to start fitting the three bolts. NOTE – the triangular plate only fits one way round, so refer to the first image above to check the orientation. This will avoid frustration and cursing (there speaks the voice of experience!) and allow the three bolts to fit in to the threaded holes as intended.
Once the three M10 bolts are securely tightened, open the inlet valve and run the generator for a few minutes to check for leaks. Assuming there are none, you have successfully replaced your first impeller.
Hi Paul – Happy to be one of the few – I learn something new every time -bargain. Cheers Gray.
Good to hear! Thanks for reading – and learning!